Water damage has a tendency to sneak up on you out of nowhere. One minute everything is normal, the next, you are ankle-deep in trouble – possibly even disaster, depending on the severity of it.
It could be from that ancient pipe finally giving up, the previous night’s thunderstorm, or that tiny water drip you kept meaning to fix but never got around to. Either way, it doesn’t just leave a mess – if you let it hang around, you’re looking at structural issues, various types of mold, and painfully costly repairs.
You May Need Water Damage Inspection
Getting your hands dirty with a thorough water damage inspection is your first line of defense. Think of it as the difference between a minor inconvenience and a full-blown home disaster.
This guide to home water damage inspection will discuss how to assess water damage like a professional, spot those hidden danger signs, and figure out what needs to happen next.
Because when it comes to water damage, what you don’t know can hurt you—and your home. So, let’s take a look at a few tips and tricks for good water damage inspection. First, let’s quickly discuss the main causes.
Common Causes of Water Damage
Water damage isn’t always dramatic, like a burst pipe or a rain-flooded basement. It usually (but not always) starts small and gradually worsens over time.
Some of the most common culprits of water damage at home include:
- Plumbing Failures: Leaky pipes, burst hoses, and faulty fixtures are the most common culprits, allowing water to seep into floors and walls.
- Roof Leaks: Damaged shingles or clogged gutters can lead to slow, relentless water infiltration.
- Appliance Malfunctions: Washing machines, dishwashers, and water heaters are surprisingly common causes of appliance malfunctions. Overflows or leaks cause water damage.
- Natural Disasters: Hurricanes, heavy rainfall, and flash floods can leave homes with standing water and potentially disastrous structural damage.
- Condensation and Poor Ventilation: Excess humidity in attics, basements, or crawl spaces can encourage huge moisture buildup, usually resulting in water damage at some point.
Categories of Water Damage
However, not all water damage is massively destructive. In our professional opinion, there are three categories that can help determine water damage assessment, cleanup, and safety measures:
- Category 1 (Clean Water): Water from broken supply pipes, rainwater, or appliance leaks. This is usually safe to clean but must be dried quickly to prevent future mold growth.
- Category 2 (Gray Water): Water from dishwashers, washing machines, or minor sewage backups. In most cases, this comes with contaminants that require disinfection after water damage inspection.
- Category 3 (Black Water): Arguably the worst kind. Floodwater, sewage backups, or stagnant water is highly unsanitary and almost certainly requires professional water damage assessment, followed by water damage restoration and remediation.
The extent of water absorption is grouped into four classes, including minimal damage (Class 1) to severe saturation (Class 4), which usually needs specialized drying equipment to solve the issue.
Home Water Damage Inspection: What to Look For

A home water damage inspection involves more than just locating visible water stains. You also need to check for signs that might indicate less obvious, hidden damage.
A professional water damage expert is your safest bet for a thorough inspection – but if you are feeling confident in approaching the problem yourself, keep in mind the following:
1. Visual Indicators
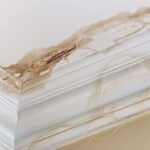
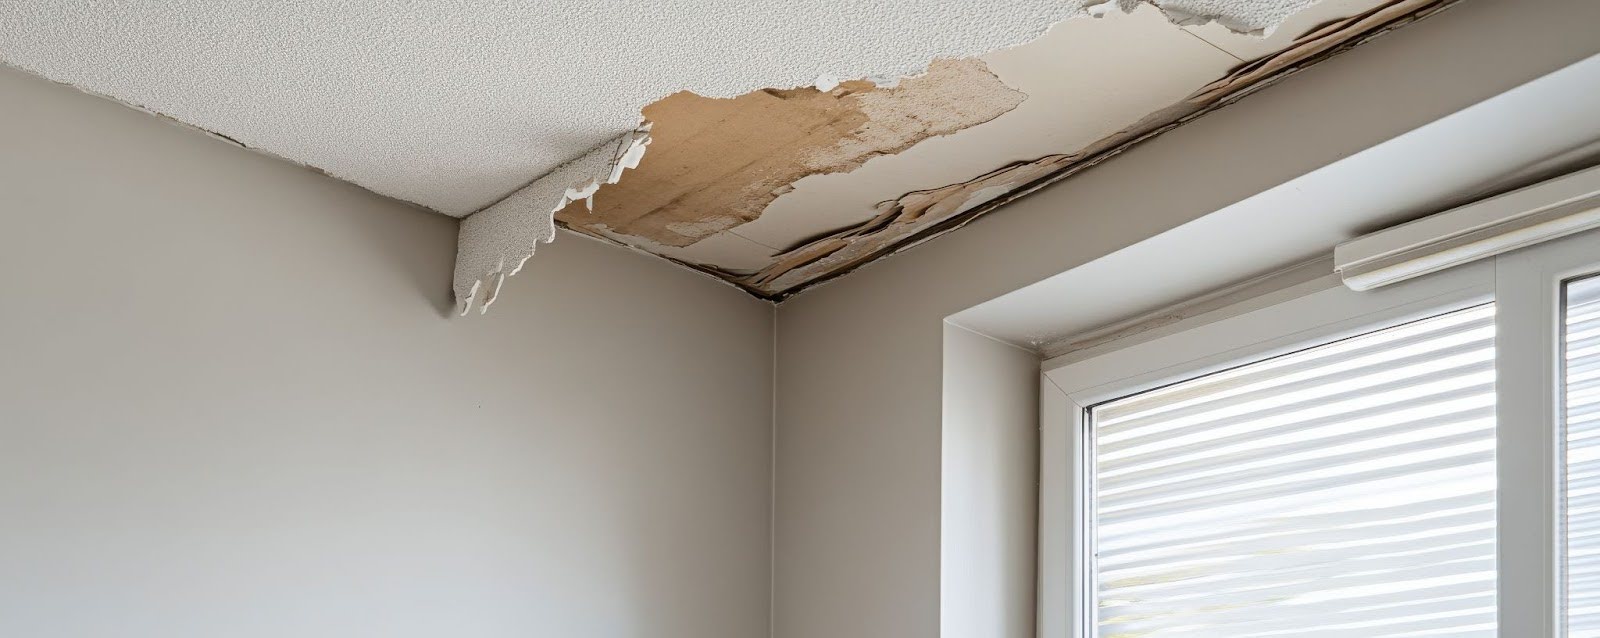
- Stains and Discoloration: Yellow, brown, or dark patches on ceilings, walls, or carpets.
- Peeling or Bubbling Paint: Moisture trapped behind walls causes the surface to bubble or flake.
- Warped or Buckled Flooring: Wood, laminate, and vinyl floors can swell and deform from prolonged moisture exposure.
- Mold Growth: Musty odors, black spots, or fuzzy patches signal long-term dampness.
2. Checking for Hidden Moisture
Even if a surface looks dry, moisture can remain beneath carpets, inside walls, and even inside insulation. Either way, the correct type of tools need to be used for hidden moisture, including:
- Moisture Meters: Measure water-damaged wood, drywall, and various other porous materials.
- Infrared Cameras: Detect temperature differences that indicate hidden moisture pockets.
- Hygrometers: Measure indoor humidity to assess lingering dampness that can lead to mold.
How to Assess Water Damage to Different Materials
The most common mistake with home water damage inspection is identifying wet spots and nothing more. The professional, thorough approach to water damage inspection is more detailed – it’s all about determining what can be saved and what needs replacement.
Ultimately, different materials react to moisture in different ways, and knowing what’s salvageable can save you a great deal of time and money. Because water can compromise the structural integrity of walls, flooring, and ceilings, making a detailed assessment is important to any restoration effort.
The faster you act, the better the chances of preventing long-term damage.
1. Walls and Ceilings
- Minor Damage: Stains and slight swelling can often be dried and repainted.
- Severe Damage: Warped drywall or ceiling sagging may require replacement.
2. Flooring
- Carpets: These can be salvaged if dried quickly, but prolonged exposure often leads to mold.
- Hardwood: Warping is common, but professional drying may restore it.
- Tile & Vinyl: Generally more resistant but may trap moisture underneath.
3. Foundations and Structural Elements
- Cracks or shifting: This usually indicates serious water intrusion that can weaken the foundation of a property.
- Rotting wood beams: In basements or crawl spaces, this should be of major concern that requires professional assessment.
4. Electrical and HVAC Systems
- Water-damaged wiring: Needs an electrician to inspect for safety hazards.
- HVAC contamination: If floodwater enters air ducts, it can spread contaminants throughout the home.
Restoration Steps for Drying, Cleaning, and Preventing Mold
Once you’ve completed a water damage inspection, the next step is drying and restoring the area thoroughly. Fast action will prevent further damage and reduce the risk of mold growth at home, which can set in within a day or two.
Effective restoration means thorough cleaning, not just drying. Sanitization is also required to prevent future issues. Let’s take a look at how to do that properly:
1. Removing Standing Water
- Wet vacuums and pumps help extract large amounts of water quickly.
- Mops and towels can handle smaller areas but require patience.
2. Drying the Space
- Dehumidifiers pull excess moisture from the air.
- Fans and air movers accelerate the evaporation process.
- Opening windows (weather permitting) can help ventilate affected rooms.
3. Cleaning and Disinfecting
- Mild detergent and water work for minor spills.
- Commercial disinfectants eliminate bacteria in gray or black water contamination.
- Mold-resistant sprays prevent future mold growth on porous materials.

When to Call a Professional for Water Damage Inspection
We don’t wish to discourage you from fixing minor leaks and spills yourself, as they can usually be handled with basic DIY methods. Removing brown water stains on a carpet, for example, probably doesn’t justify calling in the professionals for help.
But larger-scale water damage usually warrants professional intervention. If water has saturated drywall, insulation, or structural components, delaying proper treatment can lead to severe, costly deterioration.
Category 2 or 3 water damage needs specialized cleaning, while mold is another obvious concern for most homes and properties; once it starts growing, it spreads quickly and can be potentially dangerous to health.
There are also the perils of hidden moisture to consider. Often trapped behind walls or under flooring, it can cause structural weakening that isn’t immediately visible but can lead to costly repairs if left unaddressed.
In any of these scenarios, professional water damage inspections can detect underlying issues and prevent further deterioration and expensive fixes.
Preventing Future Water Damage
As is always the case, prevention is usually better than the cure – and is certainly much easier (and friendlier on your bank balance) than a full restoration. Here’s how to reduce the risk of water damage in your home:
- Regularly check the plumbing system for leaks and corrosion.
- Inspect your roof and gutters frequently to prevent rainwater infiltration.
- Install water alarms to detect leaks early.
- Use automatic shut-off valves for your main water supply.
- Seal foundation cracks to prevent groundwater from seeping in.
Bottom Line
A home water damage inspection is your first line of defense in understanding the extent of water intrusion and, ultimately, determining the best restoration approach.
All property owners should learn how to assess water damage and, more importantly, recognize when to call professionals for help. This will greatly reduce long-term issues and protect property from costly repairs – not to mention a fair amount of heartbreak.
If you are facing water damage, don’t let it grow into a bigger problem.
Contact Wet Reset for expert water damage inspection and restoration services to protect your home.